English
A fiber laser tube cutting machine should produce accurate cuts with clean edges. However, manufacturers may occasionally find burrs, dross or melted material attached to the bottom of a cut.
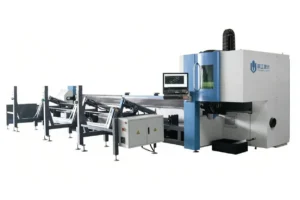
These defects do not always mean that the laser cutting machine has a serious mechanical problem. In many cases, they are caused by an unsuitable combination of cutting speed, laser power, focus position, assist gas pressure or tube positioning. For manufacturers processing metal tubes in batches, a stable automatic laser tube cutting machine can improve feeding consistency and reduce manual positioning work.
Understanding where the burr appears and what it looks like can help operators identify the cause more quickly.
This article explains seven common reasons for burr formation during laser tube cutting and provides practical troubleshooting suggestions.
What Causes Burrs in Laser Tube Cutting?
During laser cutting, a focused laser beam heats and melts the metal while assist gas removes the molten material from the cutting area.
Burrs form when the molten metal is not completely removed from the cutting kerf before it cools. The remaining material solidifies along the lower edge of the tube, creating dross or sharp burrs.
The problem may be related to the cutting parameters, assist gas system, cutting head, tube condition or feeding system.
1. Cutting Speed Is Too Fast or Too Slow
Cutting speed is one of the first parameters operators should check.
When the cutting speed is too fast, the laser may not have enough time to melt the material completely. The assist gas cannot remove the metal effectively, and hard burrs may appear on the lower edge.
However, cutting too slowly can also cause problems. Excessive heat may create a larger molten area, resulting in thick dross, wider cutting gaps and heat-affected edges.
How to solve it
Run a small cutting test using several speed settings.
Change only the cutting speed during the test while keeping the laser power, focus and gas pressure unchanged. Compare the cutting surfaces and identify the speed that produces the cleanest edge.
Avoid adjusting several parameters at the same time, as this makes it difficult to determine which setting caused the improvement.
2. Laser Power Does Not Match the Tube Thickness
The required laser power depends on the tube material, wall thickness, cutting speed and expected cutting quality.
If the power is too low, the beam may not penetrate the tube wall completely. This can produce incomplete cuts, heavy burrs and sections that remain connected.
Using excessive power is not always the solution. Too much heat can enlarge the cutting kerf and increase material melting, especially when processing thin-walled tubes.
How to solve it
Select the laser power according to:
- Tube material
- Tube wall thickness
- Cutting speed
- Assist gas type
- Required edge quality
Use the recommended starting parameters and then fine-tune the power through test cutting.
The best result comes from a balanced combination of power and speed rather than simply using the highest available laser power.
3. The Focus Position Is Incorrect
The focus position determines where the laser energy is concentrated inside the material.
An incorrect focus position reduces the effective energy density at the cutting point. This may cause incomplete penetration, rough cutting surfaces or burrs on the inside and outside edges of the tube.
Focus settings may need to be changed when processing different materials or wall thicknesses. A setting that works well for a thin stainless steel tube may not be suitable for a thicker carbon steel tube. The laser beam spot size affects how energy is concentrated at the focus point and can influence kerf formation and cutting stability. More technical information is available in this explanation of spot size in fiber laser cutting.
How to solve it
Check whether the current focus setting matches the tube material and thickness.
Operators can perform a focus test and make small adjustments while observing:
- Burr position
- Cutting surface texture
- Kerf width
- Penetration stability
- Amount of dross
Once a suitable focus position has been confirmed, save the parameter as part of the processing program.
4. Assist Gas Pressure Is Unstable
Assist gas removes molten metal from the cutting area and helps protect the cutting process.
If the pressure is too low, the gas may not remove the molten material completely. This often leaves dross attached to the bottom of the cut.
Pressure that is too high can also create unstable airflow and reduce cutting consistency.
The correct gas type is equally important. Oxygen, nitrogen and compressed air produce different cutting results depending on the metal and required edge quality.
How to solve it
Inspect the complete gas supply system, including:
- Gas source
- Pressure regulator
- Filters
- Valves
- Pipes and connections
- Actual pressure during cutting
Check for leaks, pressure fluctuations, moisture and contamination.
Do not evaluate gas pressure only when the machine is idle. The pressure should remain stable during the complete cutting process.
5. The Nozzle Is Damaged or Misaligned
The nozzle directs assist gas into the cutting kerf.
A damaged, dirty or incorrectly centered nozzle can create uneven airflow. This may cause burrs to appear mainly on one side of the cut.
Nozzle problems can also cause inconsistent results when cutting different sides of square or rectangular tubes. Proper nozzle geometry and stable gas flow are important for reducing slag adhesion and burr formation. See this technical information about laser cutting nozzle selection.
How to solve it
Inspect the nozzle for:
- Melted material
- Deformation
- Blockage
- An uneven nozzle opening
- Incorrect nozzle height
- Misalignment between the nozzle and laser beam
Clean or replace damaged nozzles and perform a nozzle-centering test before restarting production.
The nozzle diameter should also match the material thickness and gas requirements.
6. The Protective Lens Is Contaminated
Dust, smoke and metal particles can contaminate the protective lens inside the cutting head.
A dirty or damaged lens reduces beam quality and changes how laser energy reaches the tube surface. Cutting quality may gradually become worse even when the original parameters have not been changed.
Typical signs include:
- Increasing burrs
- Inconsistent penetration
- Frequent cutting interruptions
- Reduced cutting speed
- Rough cutting surfaces
How to solve it
Check the protective lens according to the machine maintenance schedule.
Replace the lens when it shows contamination, burns or coating damage. Operators should use the correct cleaning procedure and avoid touching the optical surface directly.
The workshop extraction and dust-removal system should also be checked to reduce contamination around the cutting head.
7. The Tube Is Not Positioned Stably
Tube cutting is different from flat-sheet cutting because the workpiece must rotate and move through the chuck.
If the tube bends, vibrates or moves away from the correct centerline, the distance between the cutting head and tube surface may change. This can affect focus, cutting accuracy and gas flow.
The problem is more noticeable when processing:
- Long tubes
- Thin-walled tubes
- Heavy tubes
- Irregular metal profiles
- Tubes with poor straightness
- Square or rectangular tubes with dimensional variation
Unstable loading and positioning may cause one section to cut cleanly while another section produces heavy burrs.
How to solve it
Check the following items:
- Chuck clamping force
- Tube support position
- Feeding alignment
- Tube straightness
- Centering accuracy
- Rotation stability
- Cutting head height control
An automatic loading and feeding system can improve production consistency by reducing manual positioning errors and maintaining a more stable material flow during repeated processing.
How to Troubleshoot Laser Tube Cutting Burrs Efficiently
A systematic inspection process is more effective than changing parameters randomly.
Operators can follow this order:
- Confirm the tube material and wall thickness.
- Check whether the correct cutting program has been selected.
- Inspect the nozzle and protective lens.
- Verify assist gas type and pressure.
- Check tube clamping, centering and support.
- Test the cutting speed.
- Adjust laser power and focus position.
- Cut a small sample and inspect the edge.
- Save the successful parameters for future production.
Only change one major parameter at a time. This makes it easier to identify the real cause of the burrs.
Reducing Burrs in Batch Tube Production
For factories processing large quantities of metal tubes, burrs create more than a quality problem.
They may also increase:
- Manual grinding time
- Labor costs
- Material handling
- Production delays
- Tool wear
- Rework rates
- Delivery pressure
Stable automatic feeding, accurate tube positioning and repeatable cutting parameters help reduce variation between different workpieces.
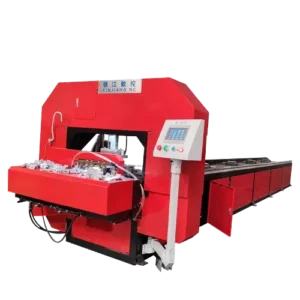
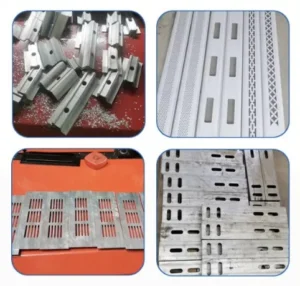
An automatic laser tube cutting machine is especially suitable for manufacturers that process repeated batches of round, square and rectangular tubes. It can reduce manual loading work while allowing fast changes between different cutting patterns without producing new molds. Manufacturers comparing different cutting methods can also read our guide on how to choose a tube cutting machine for metal pipe processing.
When Should Cutting Parameters Be Updated?
Cutting parameters should be checked whenever there is a change in:
- Tube material
- Wall thickness
- Tube diameter
- Tube shape
- Assist gas
- Nozzle specification
- Required cutting quality
- Production speed
Parameters may also need to be reviewed after replacing the nozzle, lens or cutting head components.
A parameter library should be used as a starting point rather than treated as a fixed setting for every batch of material. Send us your tube drawings, material type, wall thickness, tube dimensions and required production capacity. You can also contact our engineering team for a suitable machine configuration.
Conclusion
Laser tube cutting burrs are usually caused by a combination of cutting parameters, assist gas, cutting head condition and tube positioning.
The most important areas to check are cutting speed, laser power, focus position, gas pressure, nozzle alignment, protective lens condition and material stability.
A structured troubleshooting process can reduce unnecessary parameter changes and help operators restore cutting quality more efficiently.
For manufacturers processing metal tubes in repeated batches, an automatic laser tube cutting machine with an automatic loading and feeding system can improve production consistency, reduce manual handling and support flexible cutting of different tube shapes.
YINJIANG provides a range of fiber laser cutting machine solutions for different metal tube processing requirements.
Contact our team with your tube drawings, material information and required production capacity to receive a suitable machine configuration.
Frequently Asked Questions
Why are burrs appearing only on one side of the tube?
One-sided burrs may be caused by nozzle misalignment, uneven assist gas flow, incorrect tube centering or unstable tube rotation. Check the nozzle center, chuck position and tube support system.
Can increasing laser power remove all burrs?
No. Burr formation is not controlled by laser power alone. Excessive power may produce more heat and a wider cutting kerf. Laser power should be balanced with cutting speed, focus position and gas pressure.
Why does the same program produce different cutting results?
Differences in material thickness, tube straightness, surface condition, gas pressure, nozzle condition or tube positioning can affect the result. Inspect the material and machine condition before changing the complete parameter program.
Does automatic loading improve cutting quality?
Automatic loading mainly improves feeding efficiency and production consistency. When correctly configured, it can reduce manual positioning errors and provide a more stable workflow for batch tube processing.