English
Accurate tube punching machine hole positioning is important when metal tubes and profiles need repeated holes for assembly, welding or connection.
A common production problem is that the first few holes appear correct, but later holes gradually move away from the required position. In other cases, the hole spacing is inconsistent between different workpieces even though the same production program is being used.
This does not always mean that the punching machine itself has a serious mechanical problem.
Hole-position errors can be caused by material feeding, clamping, tube straightness, punching tools, parameter settings or the positioning reference.
Understanding these factors can help operators troubleshoot the problem more efficiently.
1. Feeding Distance Is Not Accurate
The first area to check is the material feeding system.
On an automatic tube punching machine, the workpiece needs to move to a defined position before each punching cycle.
If the actual feeding distance is different from the programmed distance, the hole position will also be different.
Possible causes include:
- Incorrect feeding parameters
- Loose transmission components
- Servo positioning errors
- Mechanical backlash
- Incorrect calibration
- Material slipping during feeding
Servo positioning systems are designed to move an axis toward defined setpoint positions. Siemens describes controlled positioning as moving a linear axis to specified positions using setpoint position and speed values.
How to check it
Do not begin by changing several machine parameters at the same time.
First, mark a reference point on the material and command the machine to feed a known distance.
For example, if the programmed feeding distance is 500 mm, measure whether the actual movement is also 500 mm.
Repeat the test several times.
If the error becomes larger after every feeding cycle, the problem may be related to cumulative positioning error rather than the punching die itself. For more common production issues, read our guide to automatic tube punching machine production problems.
2. The Tube Moves During Punching
Even if the feeding position is correct, the material can still move when the punching force is applied.
This can happen when:
- Clamping force is insufficient
- The fixture does not match the tube size
- The tube surface is oily
- The material is not supported correctly
- The workpiece moves during punching
- The clamping components are worn
For long tubes, stable support becomes especially important.
If one end of the tube is unsupported, its own weight can affect the position of the workpiece.
How to check it
Before punching, check whether the tube can move inside the fixture.
After one hole is punched, compare the original reference position with the current position.
If the workpiece has shifted, inspect the clamping and support system before adjusting the servo parameters.
A positioning problem caused by material movement cannot be completely solved by changing the feeding program.
3. The Tube Is Bent or Not Straight
Not every positioning problem comes from the machine.
The material itself can also affect punching accuracy.
Long tubes and profiles may have:
- Bending
- Twisting
- Dimensional variation
- Uneven surfaces
- Different wall thicknesses
- Poor straightness
If a tube does not remain in the same position during feeding, the relationship between the punching die and the workpiece can change.
This is especially noticeable when processing long square tubes, rectangular tubes or profiles.
Example
Imagine that a six-meter tube has a small bend.
At the beginning of the workpiece, the tube may sit correctly inside the fixture.
As the feeding system moves the material forward, the bent section may gradually shift the tube away from its original centerline.
The programmed feeding distance can still be correct, but the actual punching position relative to the tube surface may change.
How to solve it
Check the straightness of the material before changing machine settings.
Also inspect:
- Material support height
- Guide position
- Clamping position
- Feeding centerline
For difficult materials, additional support or positioning fixtures may be required.
We have discussed this problem in more detail in our article about tube deformation during punching.
4. Punch and Die Alignment Is Incorrect
The punch and die must work together correctly.
If the punch is not correctly aligned with the die opening, the quality and position of the hole may be affected.
Tooling alignment becomes particularly important when:
- The die has recently been replaced
- A new hole size is being used
- The machine has been adjusted
- The tool has been removed for maintenance
- The machine is processing thicker material
Mate Precision notes that punch-to-die clearance and tooling condition can be evaluated through the resulting punched slug and hole condition, and that proper die clearance is an important part of punching quality.
How to check it
Inspect whether:
- The punch is centered
- The die is correctly installed
- The die is securely fixed
- The punch enters the die evenly
- The tooling specification matches the material
Do not continue high-volume production when the punch and die show obvious misalignment.
Incorrect tooling conditions can increase wear and create inconsistent results.
5. Punching Tools Are Worn
Punches and dies are consumable tooling.
After repeated punching, cutting edges gradually become worn.
A worn punch may produce:
- Larger burrs
- Poorer hole edges
- Increased punching force
- Irregular hole shapes
- Less consistent processing quality
Mate Precision recommends regular inspection and sharpening rather than waiting until tooling becomes heavily worn; maintaining sharper tooling can improve consistency and reduce required punching force.
How to check it
Compare a newly punched hole with an earlier production sample.
Look for:
- Increased burr height
- Uneven hole edges
- Changed hole diameter
- Visible tool damage
- Abnormal punching noise
If the feeding position is correct but hole quality is gradually deteriorating, tooling condition should be inspected.
For factories running long production batches, a tooling maintenance schedule is useful.
6. The Zero Point or Processing Program Is Incorrect
Sometimes the machine hardware is working normally, but the processing reference is wrong.
This can happen after:
- Changing product specifications
- Loading a different program
- Replacing tooling
- Adjusting the fixture
- Changing the material size
- Resetting machine parameters
If the starting reference position is incorrect, every hole in the program may be shifted by the same amount.
There are two common patterns
Situation A: Every hole is shifted by the same distance
This often suggests that the zero point, starting position or program reference needs to be checked.
Situation B: The error becomes larger after each hole
This is more likely to be related to feeding distance, slipping or accumulated positioning error.
Understanding this difference can make troubleshooting much faster.
How to Troubleshoot Hole Position Errors Step by Step
When hole positions become inaccurate, randomly adjusting machine settings usually makes troubleshooting more difficult.
A better inspection sequence is:
- Confirm the correct product program is selected.
- Check the material dimensions.
- Check the starting reference position.
- Measure the actual feeding distance.
- Check clamping and material movement.
- Inspect material straightness and support.
- Check punch and die alignment.
- Inspect tooling wear.
- Produce several test pieces.
- Compare the measurements before restarting batch production.
Change only one major factor at a time.
If several settings are changed together, it becomes difficult to determine which change actually solved the problem.
Why Does the First Hole Look Correct but Later Holes Become Misaligned?
This is one of the most useful clues during troubleshooting.
If the first hole is correct but each following hole becomes slightly farther away from the required position, the problem may be related to the feeding process.
For example:
Required spacing:
100 mm → 100 mm → 100 mm → 100 mm
Actual spacing:
100 mm → 100.5 mm → 101 mm → 101.5 mm
This type of increasing deviation suggests that operators should inspect feeding distance, calibration, mechanical transmission and possible material movement.
By contrast, if every hole is shifted by exactly 3 mm but the spacing between holes remains correct, the issue may be the starting reference rather than the feeding accuracy.
Does Automatic Feeding Guarantee Accurate Hole Positioning?
No machine should be treated as completely independent of setup and maintenance.
Automatic feeding reduces repeated manual measurement and allows the machine to position material according to programmed values, but final accuracy still depends on:
- Machine configuration
- Feeding system
- Clamping
- Material condition
- Tooling
- Calibration
- Parameter settings
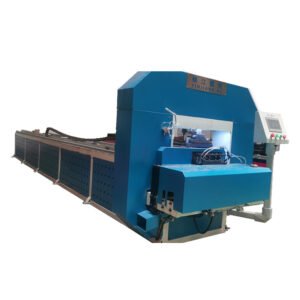
YINJIANG’s automatic punching equipment combines servo-driven systems, hydraulic punching and long feeding capability for tube and profile processing. The current single-station automatic punching machine, for example, is designed for materials including channel steel, angle steel, flat steel, I-beams, square pipes and seamless pipes.
This is why machine configuration should always be matched to the actual customer’s material and product drawing.
What Information Helps Diagnose a Positioning Problem?
When asking the machine manufacturer for technical support, do not simply say:
“Hole position is inaccurate.”
Providing more information will make troubleshooting much faster.
Useful information includes:
- Material type
- Tube/profile dimensions
- Wall thickness
- Workpiece length
- Hole diameter
- Required hole spacing
- Actual measured hole spacing
- Whether the error is constant or increasing
- Machine program settings
- Photos of the finished workpiece
- Video of the feeding and punching process
A drawing with both the required and actual hole positions is especially useful.
When Should the Machine Manufacturer Be Contacted?
Operators can normally check basic items such as tooling condition, material position and program settings.
However, contact the machine manufacturer when:
- Feeding deviation continues after calibration
- Servo positioning is unstable
- Abnormal mechanical movement appears
- The machine repeatedly loses its reference position
- Punch and die alignment cannot be corrected
- The same error appears with different materials and programs
Avoid repeatedly changing internal control parameters without understanding their function.
For automatic equipment, incorrect parameter changes can create new positioning problems.
Conclusion
Tube punching machine hole positioning problems can come from several different sources.
The six most common areas to inspect are:
- Feeding distance
- Material clamping
- Tube straightness
- Punch and die alignment
- Tool wear
- Program and zero-point settings
The most effective troubleshooting method is to identify whether the error is constant, random or cumulative.
A constant offset often points toward the starting reference or setup.
An increasing error often suggests feeding or material movement.
Poor hole shape together with positioning problems may indicate tooling condition or alignment issues.
For repetitive tube and profile production, an automatic punching machine with suitable feeding, clamping, tooling and machine configuration can reduce repeated manual positioning and support more consistent batch processing.
If you are experiencing inaccurate hole spacing, send us your material dimensions, hole layout, product drawing and photos of the finished part. Our engineering team can help evaluate the machine configuration and processing requirements. contact our engineering team.
FAQ
Why are my punched holes gradually moving out of position?
If the positioning error becomes larger after every hole, check feeding distance, servo calibration, mechanical transmission and material slipping.
Why are all holes shifted by the same amount?
When all hole positions have a similar offset but the spacing remains correct, check the starting reference, zero point and workpiece positioning.
Can worn punches affect hole accuracy?
Worn punches and dies can affect hole quality and processing consistency. Tooling should be inspected and maintained regularly.
Does bent tubing affect automatic punching?
Yes. If the material does not remain stable and correctly supported during feeding, its position relative to the punching station can change.
How can I improve hole-spacing consistency in batch production?
Start by checking feeding accuracy, material clamping, support, tooling condition and program settings. Automatic feeding can reduce repeated manual positioning, but correct machine setup and maintenance remain important.